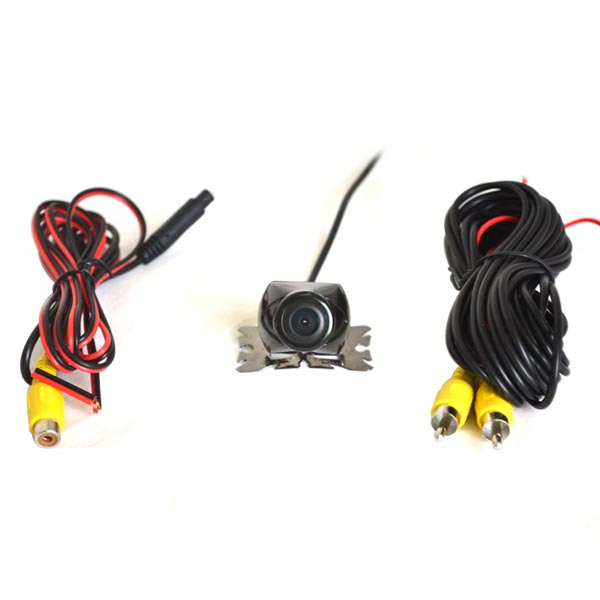
HOW TO WIRE A REVERSING CAMERA TO REVERSE LIGHT
In this particular guide, we take you through all the actions you need to take in a step-by-step format to correctly install a reversing camera on your vehicle.
STEP BY STEP GUIDE
STEP 1: IDENTIFY THE TYPE OF CAMERA AND WHERE TO FIX IT
The initial phase you need to take when installing a reversing camera is to decide on the best camera to best satisfy your needs and the exact location you plan to fix it.

In case you are uncertain about the most appropriate camera for you, you can always consult the various auto repair workshops in your vicinity.
As soon as you have settled on the type of camera you need and where to place it, then you are set to go.
STEP 2: DISCONNECT YOUR CAR BATTERY
Disconnect your vehicle’s battery through pulling off the negative cable. Follow this with wiring the camera to the car battery as per the instructions as outlined in your kit.
The battery functions as the power source of the camera.
Be extra cautious when performing this step since you can easily strip the screw on the battery’s negative terminal.
It is recommendable that you employ a standard (8mm) socket to perform this. What’s more, you need to ensure that the negative terminal and the positive one are well apart from each other.
STEP 3: INSTALL YOUR REAR VIEW MONITOR
There are various accessible locations in which you can install your monitor.
The usual favorites are either in the sun visor or the vehicle’s dashboard. This monitor will facilitate a view of everything behind the car before you start backing out and as such, it needs to be in a spot where it is convenient for you when you are driving.
STEP 4: INSTALL YOUR CAMERA USING A DRILL
Before you commence on any marking or drilling action, ensure that you properly center and measure out yourself at least twice.
Afterwards, you can mount the camera on the vehicle’s license plate, bumper or any other spot at your vehicle’s rear.
The camera’s kit will come with all the necessary fixing accessories. Proceed to attach the power wire of your camera to the power wire of the backup light on your vehicle.
In case you have bought a wireless camera, you need not wire it.
A point to note is that you can run your camera cables either under your vehicle’s body or through it.
If you decide to run through, you will have to remove several panels to ensure it remains neat and subsequently out of the way.
It is recommendable that the cables run through your vehicle’s passenger side to ensure that there is no incidence of looping either around the control/steering systems or footwell.
Finally, you will need to power sources to power the screen and the camera. At this juncture, you will have to run your camera wiring via your access points, pried, tied or drilled.
STEP 5: INSTALL THE REVERSING CAMERA
Attach the power/red wire to your car’s reverse-light power wire. Splice these wires together carefully.
You can use wire cutters when cutting the wires and ensure you leave ample excess wire length to reconnect.
Or you can slice it correctly into the already existing cable and subsequently loop in.
This will instantly power your camera once you engage your vehicle in reverse mode.
STEP 6: RECONNECT THE CAR BATTERY
Reconnect the car battery and then engage the vehicle in reverse mode.
Your already installed rear-view monitor should immediately switch on and allow you to see what is happening behind the car.
Ensure you properly test your reversing camera before driving around with it.
Ensure that it gives you a clear image of precisely what is happening behind your vehicle.
You can do this by turning on both the monitor and the camera and then proceed to place an immobile object just behind your car.
Immediately after, you can engage your vehicle in reverse mode but while keeping your foot on the brakes. Check whether you can see this object on your monitor. If so, then you are good to go!
TIPS:
- Most reverse cameras are structures only to operate when the car is in reverse mode. Nonetheless, the manufacturer may outline instructions on rewiring the camera to perform differently.
- Before permanently fixing your monitor, try out different spots to ascertain that the place you settle for is the most appropriate and convenient spot, many kits offer double-sided tape, other mounting accessories, and screws.
