HOW TO WIRE A REVERSING CAMERA TO REVERSE LIGHT

In this particular guide, we take you through all the actions you need to take in a step-by-step format to correctly install a reversing camera on your vehicle.

STEP BY STEP GUIDE

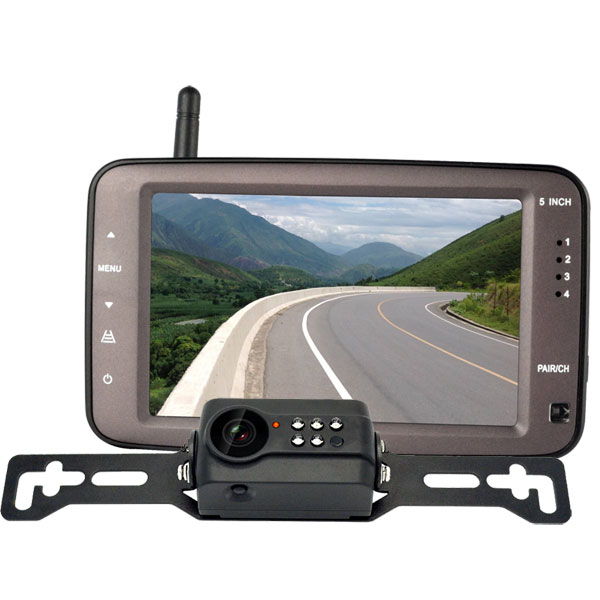
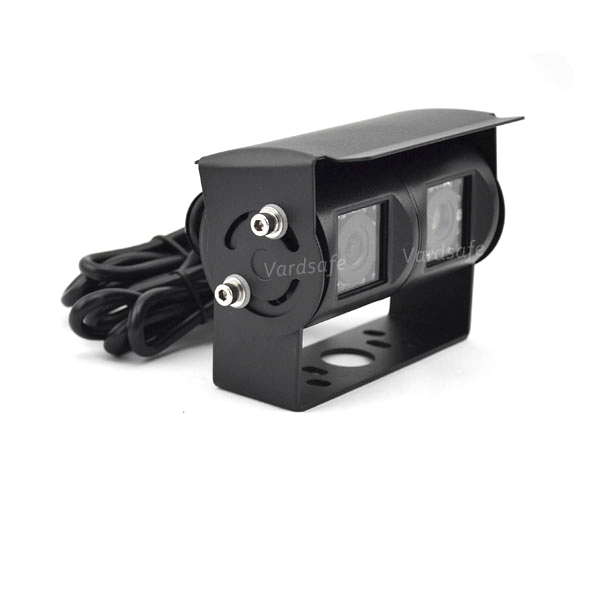
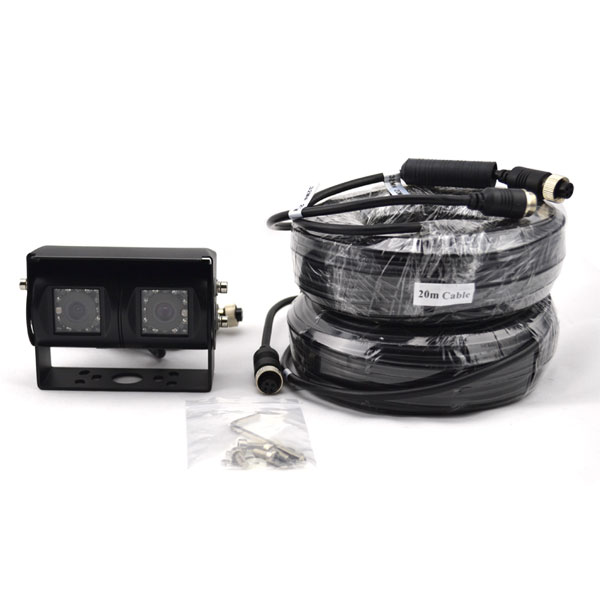
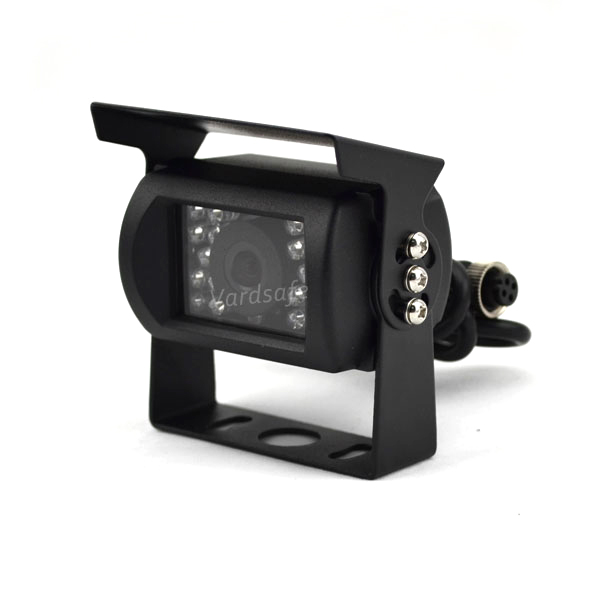
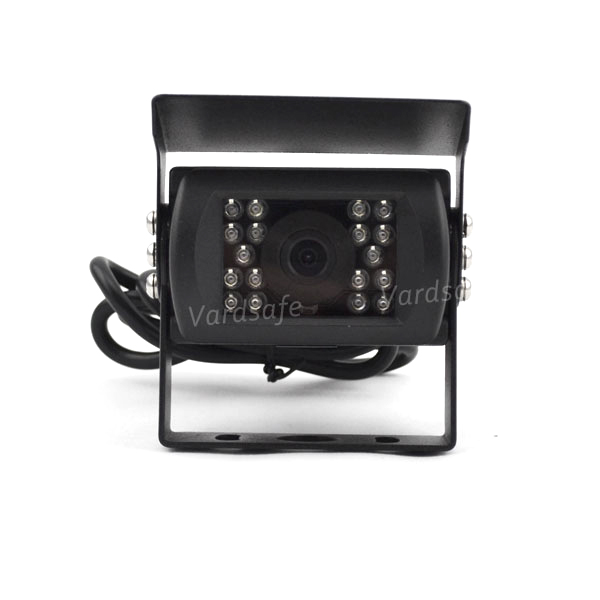
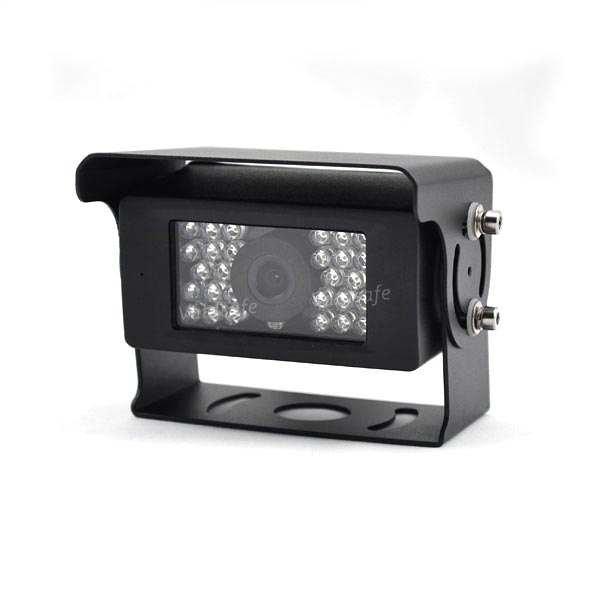
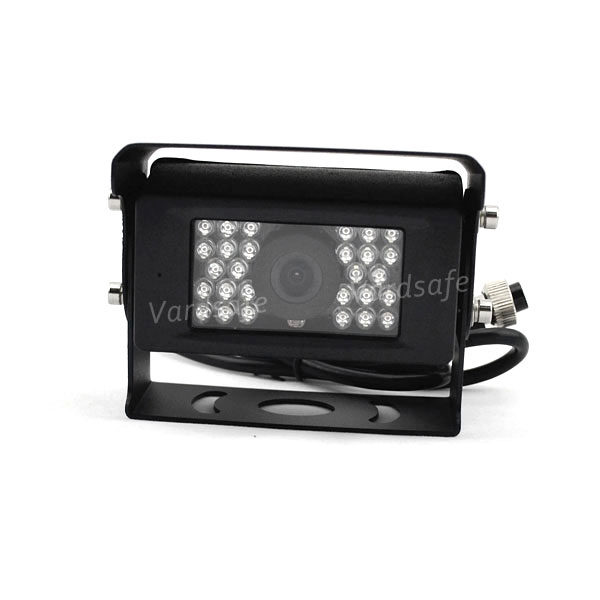
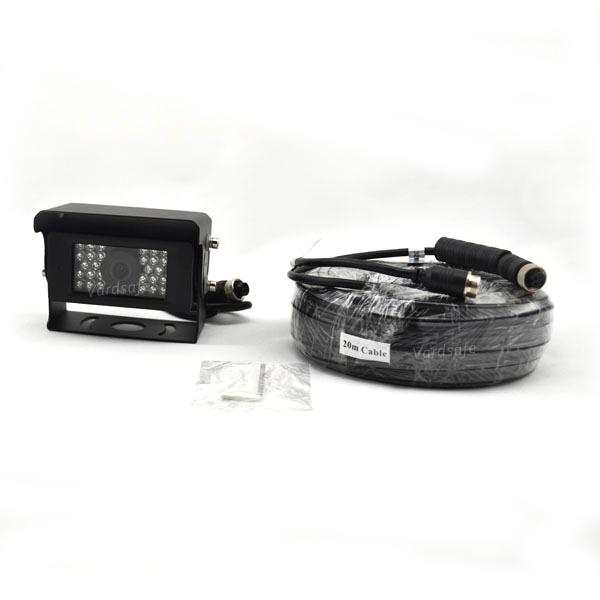
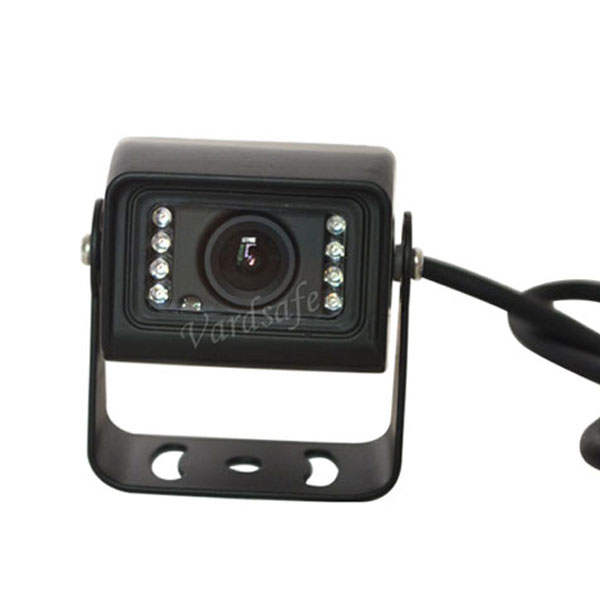
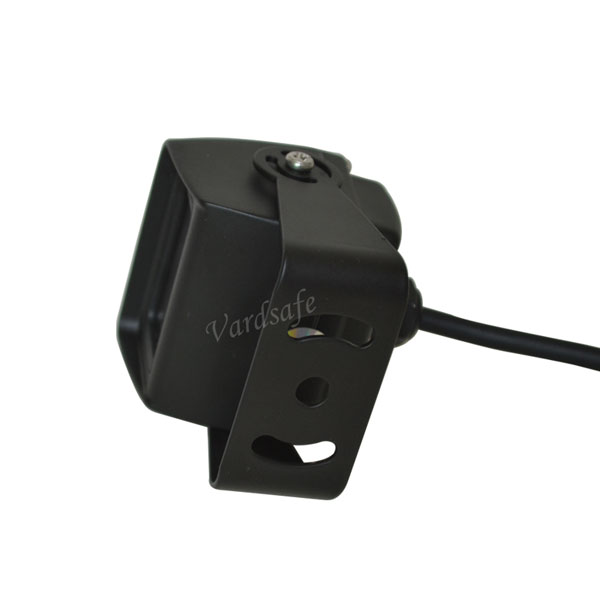
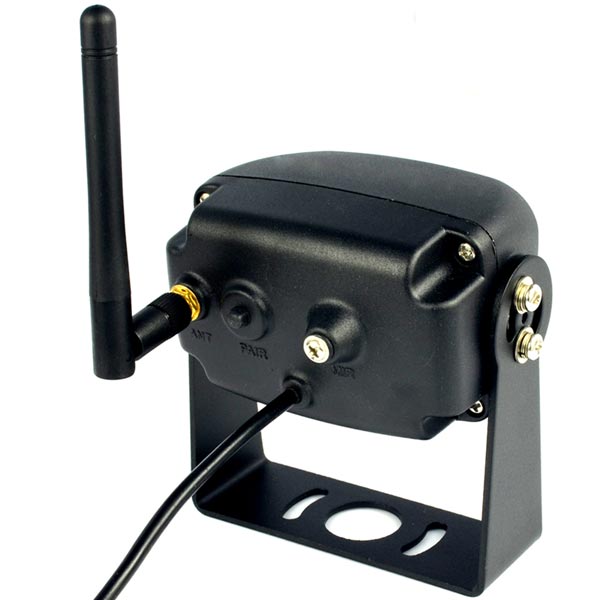
STEP 1: IDENTIFY THE TYPE OF CAMERA AND WHERE TO FIX IT

The initial phase you need to take when installing a reversing camera is to decide on the best camera to best satisfy your needs and the exact location you plan to fix it.
rear view camera kit
In case you are uncertain about the most appropriate camera for you, you can always consult the various auto repair workshops in your vicinity.

As soon as you have settled on the type of camera you need and where to place it, then you are set to go.

STEP 2: DISCONNECT YOUR CAR BATTERY

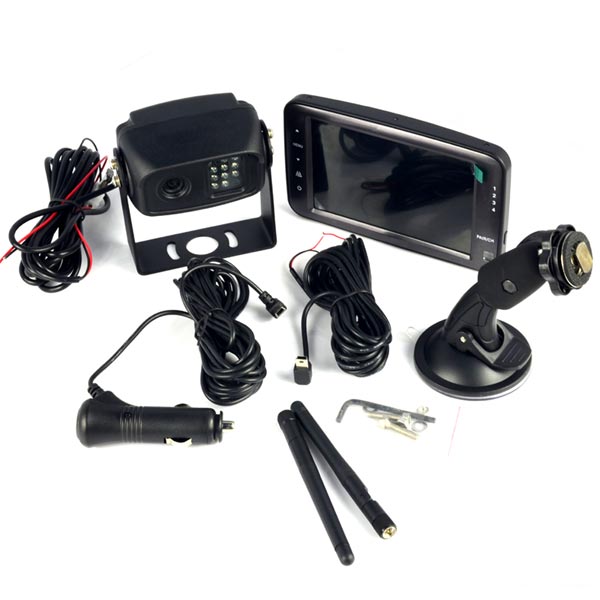
Disconnect your vehicle’s battery through pulling off the negative cable. Follow this with wiring the camera to the car battery as per the instructions as outlined in your kit.

The battery functions as the power source of the camera.

Be extra cautious when performing this step since you can easily strip the screw on the battery’s negative terminal.

It is recommendable that you employ a standard (8mm) socket to perform this. What’s more, you need to ensure that the negative terminal and the positive one are well apart from each other.

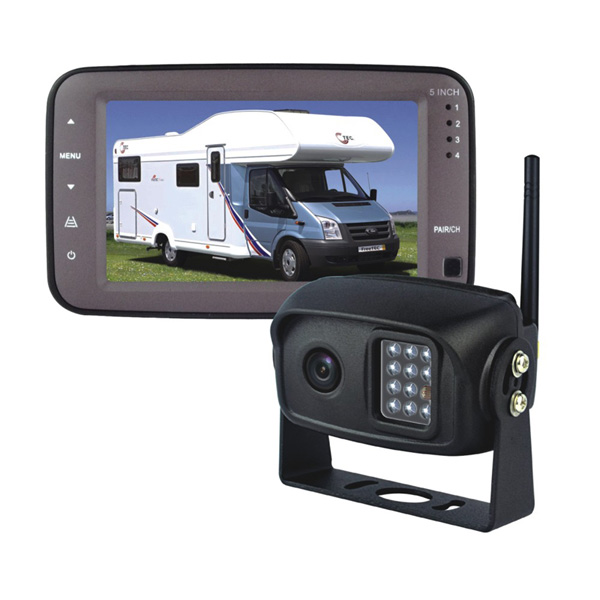
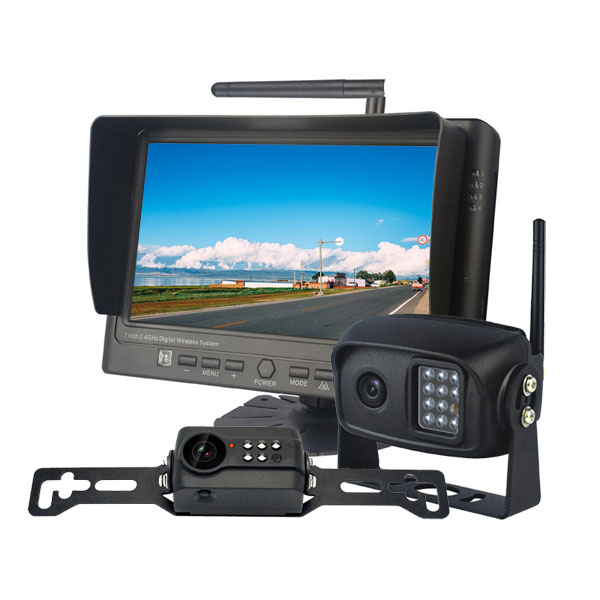
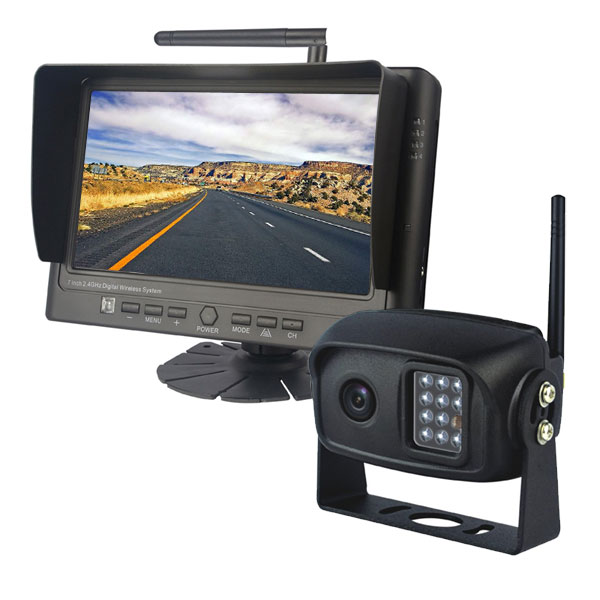
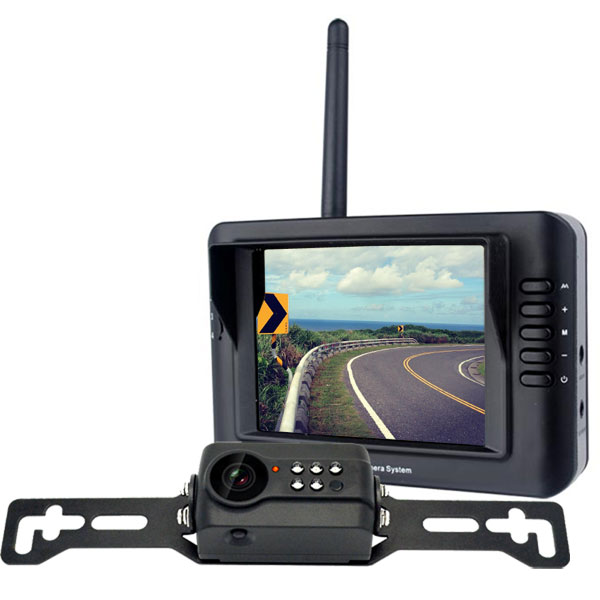
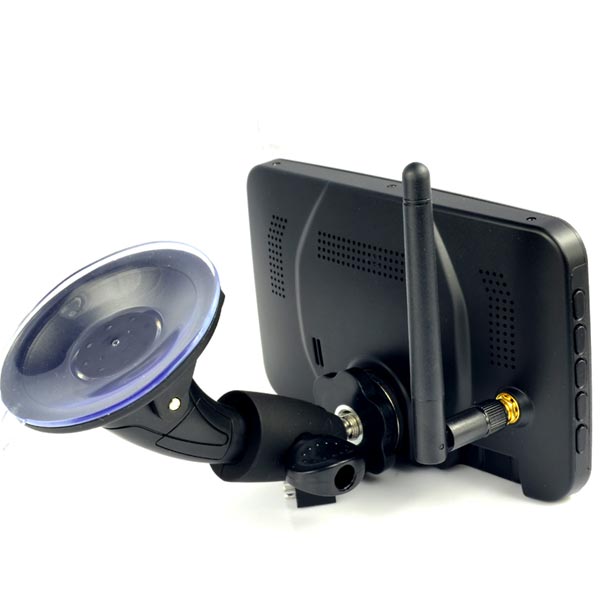
STEP 3: INSTALL YOUR REAR VIEW MONITOR

There are various accessible locations in which you can install your monitor.

The usual favorites are either in the sun visor or the vehicle’s dashboard. This monitor will facilitate a view of everything behind the car before you start backing out and as such, it needs to be in a spot where it is convenient for you when you are driving.

STEP 4: INSTALL YOUR CAMERA USING A DRILL

Before you commence on any marking or drilling action, ensure that you properly center and measure out yourself at least twice.

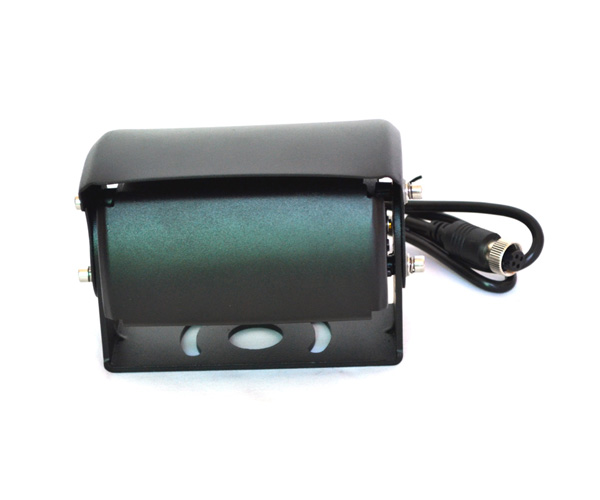
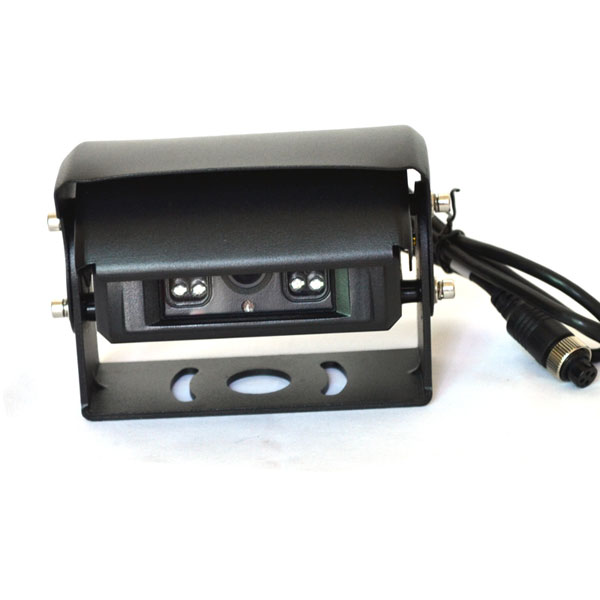
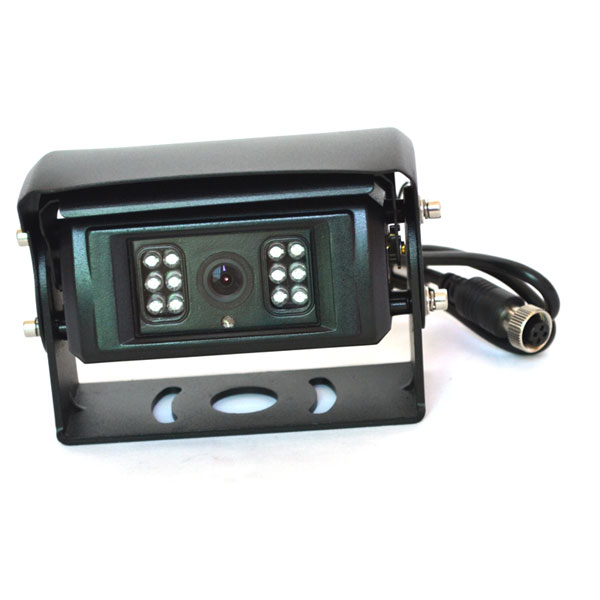
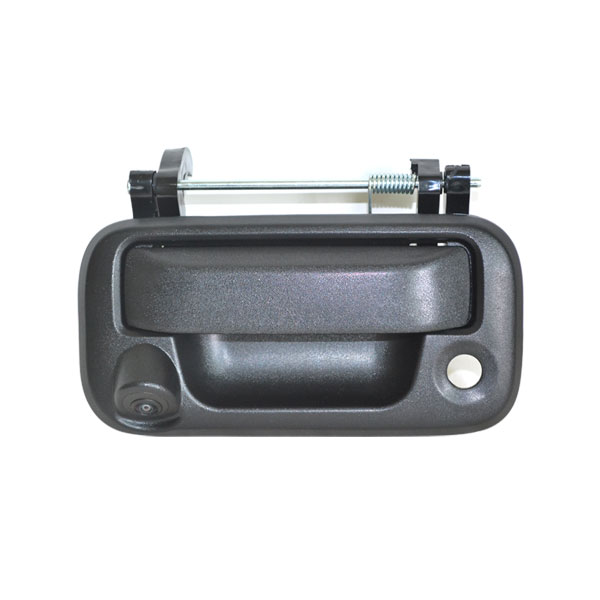
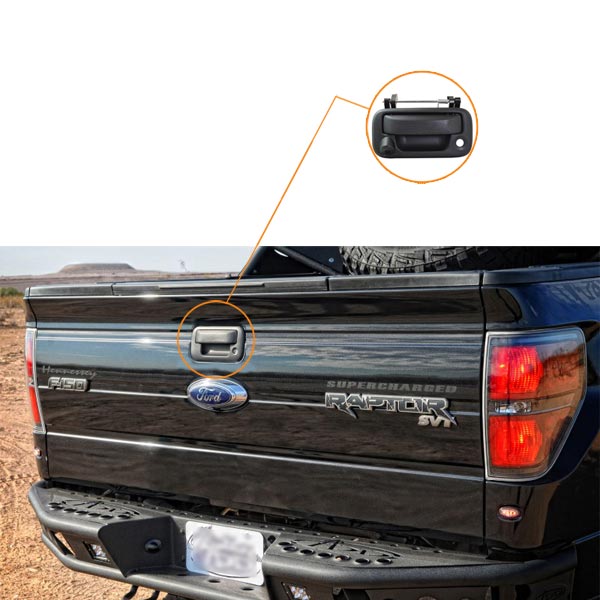
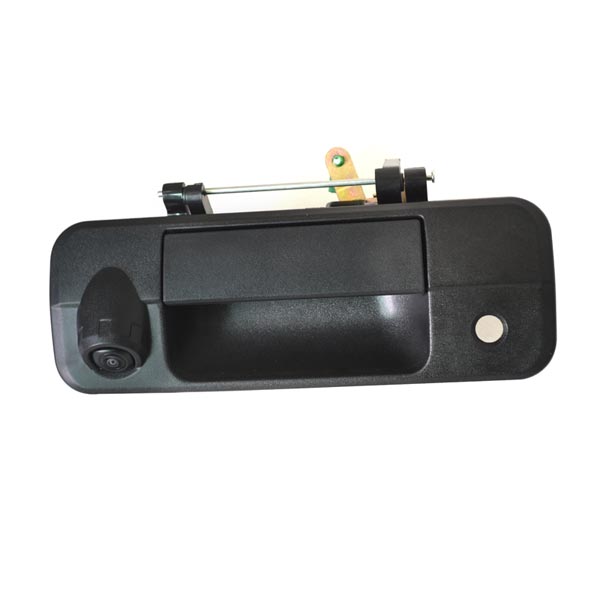
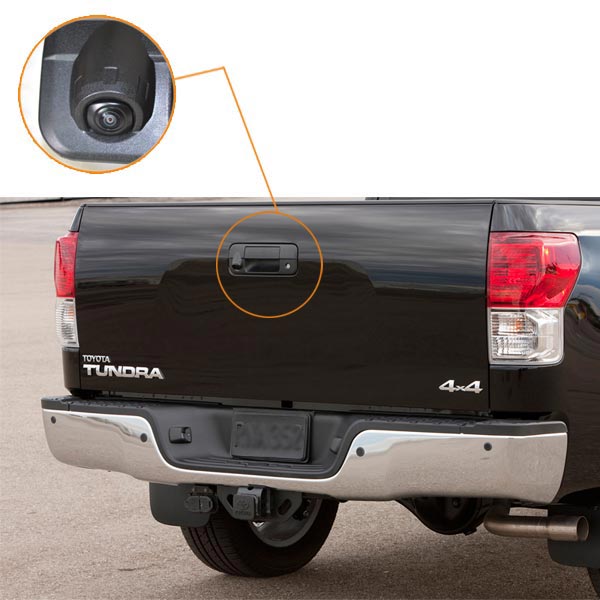
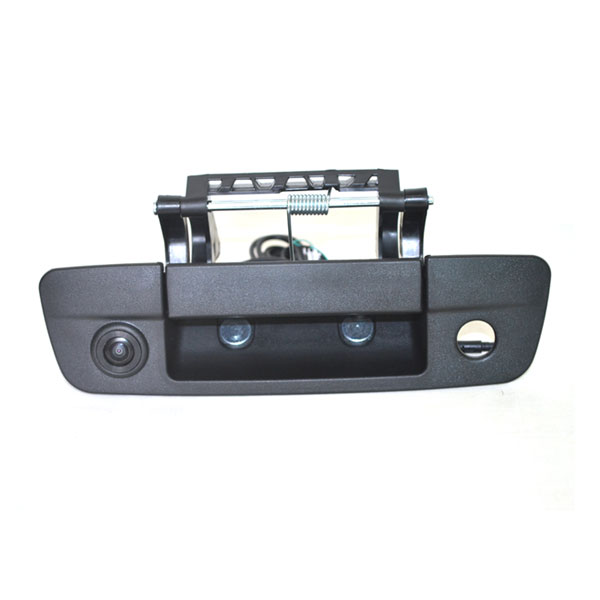
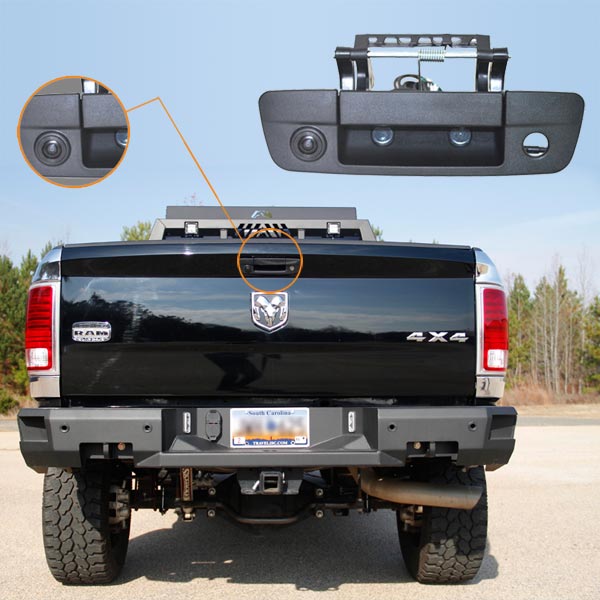
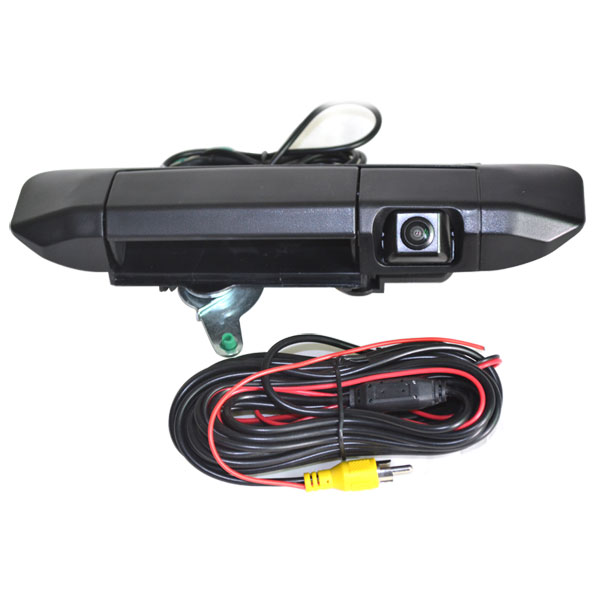
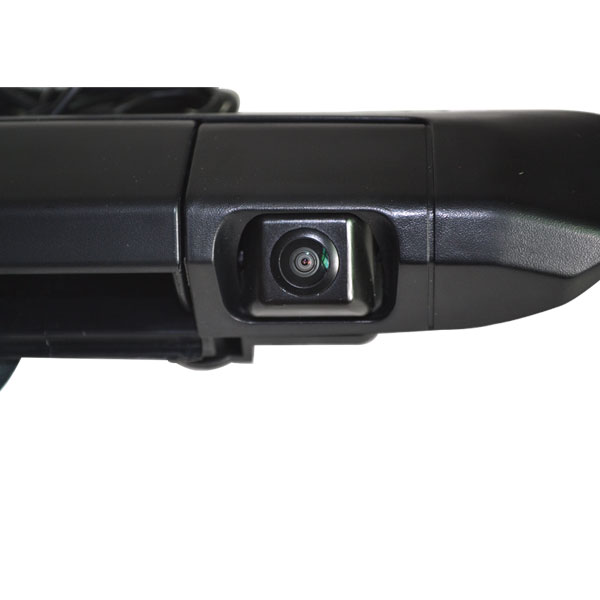
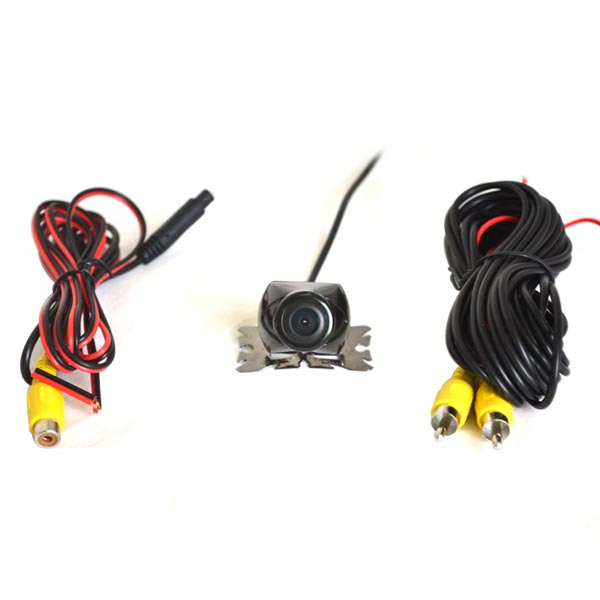
Afterwards, you can mount the camera on the vehicle’s license plate, bumper or any other spot at your vehicle’s rear.

The camera’s kit will come with all the necessary fixing accessories. Proceed to attach the power wire of your camera to the power wire of the backup light on your vehicle.

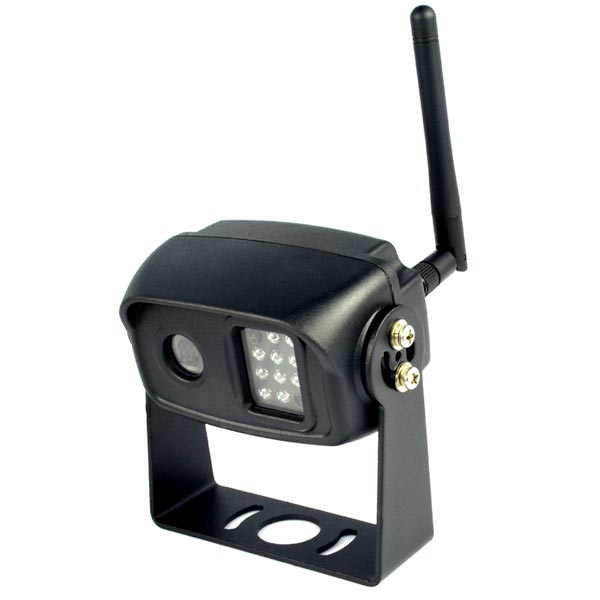
In case you have bought a wireless camera, you need not wire it.

A point to note is that you can run your camera cables either under your vehicle’s body or through it.

If you decide to run through, you will have to remove several panels to ensure it remains neat and subsequently out of the way.

It is recommendable that the cables run through your vehicle’s passenger side to ensure that there is no incidence of looping either around the control/steering systems or footwell.

Finally, you will need to power sources to power the screen and the camera. At this juncture, you will have to run your camera wiring via your access points, pried, tied or drilled.

STEP 5: INSTALL THE REVERSING CAMERA

Attach the power/red wire to your car’s reverse-light power wire. Splice these wires together carefully.

You can use wire cutters when cutting the wires and ensure you leave ample excess wire length to reconnect.

Or you can slice it correctly into the already existing cable and subsequently loop in.

This will instantly power your camera once you engage your vehicle in reverse mode.

STEP 6: RECONNECT THE CAR BATTERY

Reconnect the car battery and then engage the vehicle in reverse mode.

Your already installed rear-view monitor should immediately switch on and allow you to see what is happening behind the car.

Ensure you properly test your reversing camera before driving around with it.

Ensure that it gives you a clear image of precisely what is happening behind your vehicle.

You can do this by turning on both the monitor and the camera and then proceed to place an immobile object just behind your car.

Immediately after, you can engage your vehicle in reverse mode but while keeping your foot on the brakes. Check whether you can see this object on your monitor. If so, then you are good to go!

TIPS:

  • Most reverse cameras are structures only to operate when the car is in reverse mode. Nonetheless, the manufacturer may outline instructions on rewiring the camera to perform differently.
  • Before permanently fixing your monitor, try out different spots to ascertain that the place you settle for is the most appropriate and convenient spot, many kits offer double-sided tape, other mounting accessories, and screws.

How to Hook Up Backup Camera to Radio in 7 Steps

If your vehicle lacks a backup camera, but has a radio with a video monitor. And if you would love to install a camera, or to just upgrade an existing one, then this guide is for you. There could be other conditions for installing the camera, but this guide assumes that your vehicle already has a monitor installed.

Before You Begin

In order to guarantee your success with this install, there are a few prerequisites that you must have to attend to, before moving on. They are as follows:

– Confirm Your Radio’s Video Input

This is the first step, because if your head-unit can’t handle video, then there is no need to continue. You can check your vehicle’s manual for clarification.

Although the video input would mostly be a yellow-colored female RCA plug, some car makers can also have unique plugs for their system’s video input. In such a case, you will have to get an adapter.

– The CAN Bus & Trigger Cables

The Controller Area Network, also referred to as CAN Bus, is a system used by car makers to make wiring easier in a vehicle. Trigger cables are single wires that run from a video monitor to the reverse light of a car. Whenever available, the monitor uses the trigger cable to know when to switch to the camera’s feed. Check to confirm if your vehicle controls your brake light, using a CAN Bus, because if it does, then you don’t need to install a trigger cable.

– Tools

You will need screwdrivers, pliers, pin and trim removal tools, depending on your type of vehicle. Having the right tools enables you, to carefully and cleanly remove parts of the vehicle, which are necessary for a successful installation.

The 7-Step Backup Camera Installation Process

Step 1: Take The Car Apart

The first step is the careful removal of your vehicle’s dashboard, or any other part that needs to be removed, before the installation can continue. You will also have to make way in your car’s rear, to find cables that power the reverse light, and to optimally install the camera itself. Your vehicle’s manual will come in handy here, because it can offer useful diagrams, which can help you to properly unmount the necessary parts of the car.

Step 2: Install The Camera

The second step is the installation of the backup camera. This can be easy or difficult, depending on the type of camera you have. License plate cameras for cars, and roof-top cameras for vans, are the easiest to install. Most cameras will come with an installation kit, so use it and install the camera properly.

Step 3: Connect Camera Cables

This is where it gets a little complicated for many people, so pay attention.

a). Connect the DC power cable to the red DC female plug of the camera. The DC power cable has 2 wires. One wire is usually red, and the other, black.

b). Connect the other 2 ends of this power cable to your vehicle’s reverse light. The red wire connects to the +12V reverse cable, while the black one connects to either the -12V, or the vehicle’s chassis (ground).

c). There will be a long cable with a yellow, RCA male plug on each end. Connect one of these plugs, to the yellow, RCA female plug from the camera.

d). This same long cable, should have a short wire branching out from each RCA plug. This is the trigger wire. If you want the monitor to automatically show the camera’s feed once you change into reverse gear, then connect this trigger wire to the same +12V cable of your reverse light. Please note that your monitor will have to support trigger cables, for this to work.

e). If your camera is a wireless system, then you will have to connect the cable with the red and yellow plugs to the camera. This is the transmitter part of a wireless system. The receiver part of wireless setups, usually have just one yellow plug, and a trigger wire.

Step 4: Run the Cable

You will now have to run the cable from your car’s rear, to the front. If your backup camera system, is the wireless type with a transmitter and receiver, then you can skip this step.

Step 5: Connect Radio Cables

a). Connect the other yellow, RCA male plug from the long cable, to your car radio’s video input. If necessary, then use an adapter. If you have a wireless system, then connect the single yellow plug from the receiver to your car radio.

b). If your monitor supports trigger wires, then connect the trigger wire to your monitor. Wireless systems usually have a trigger wire on this receiver end. If your vehicle uses a CAN Bus decoder to control its reverse lights, then there will be no need for a trigger cable.

c). In a situation where you are using a wireless backup camera system, you will additionally have to provide power for the receiver. You can either connect to the same power source as your car radio, or get power through the vehicle’s fuse box.

Step 6: Finish Up

It is now time to put everything back in its place. You have to reinstall the radio, close the reverse light compartment, and tighten every screw and bolt, back into its place. Certain newer radios may also need some software reprogramming or configurations-update, at this stage.

Step 7: Ignition & Test

To finish up, start your engine and shift into reverse gear. If all goes well, you should see your backup camera’s feed in the monitor.

Conclusion

The above seven steps will work with most systems and vehicles. There will always be exceptions of course, but if you follow these guidelines, you should be able to rectify any issues.

Top 10 Frequently Asked Questions about Our Backup Cameras

Many of our customers have had one question or the other, concerning our backup camera systems. Following are the 10 most frequently asked of these questions. They should hopefully answer any questions that you may have.

1. Can I install the camera by myself?

Yes, you can install our backup camera systems by yourself. You just have to understand 12Volt systems, and have the necessary tools for the installation. This basically means a tester for your car’s wiring, because other necessary installation tools are supplied with the camera’s package. Installing a wireless backup camera system should take you about 20 minutes or less, while a wired system takes much longer.
wireless rear view camera kit system

2. Will your cameras work on any vehicle?

Yes, our camera systems work on all types of vehicles, except when otherwise stated. These exceptions include cameras that are specifically designed for specific vehicles, for example, tailgate cameras for specific trucks. Flush-mount, bumper and license-plate cameras on the other hand, can be fitted on any kind of vehicle.

Whether you have a sedan, SUV, minivan, pickup-truck or any kind of commercial vehicle, you can rest assured that our backup camera system will get the job done.

3. Does your backup camera system work well at night?

Yes, our backup cameras deliver very clear images at night. They feature infra-red LEDs, which illuminate the dark space behind your vehicle with infra-red radiation, which are invisible to the human eye. The cameras’ lenses pick up these heat-signature radiations and process them into visible images. All our cameras feature infra-red night vision, unless where otherwise stated.

4. Does the backup camera come with a warranty?

Yes, we back all our products with a 1-year warranty. This guarantees that the camera or camera system, will be free from all workmanship and material defects for one year. It should be noted though, that this warranty does not cover defects which may arise from misuse, mishandling or improper installation of the product. Backup cameras are meant to help drivers worldwide to drive more safely, and we guarantee that our systems will work as promised.

5. Will a backup camera installation void my vehicle’s warranty?

No, a backup camera installation will not void your car’s manufacturer warranty. It is illegal for any car dealer to deny your vehicle a warranty coverage, because of an aftermarket accessory installation like a backup camera. An exception to this rule, is a case where an aftermarket accessory was improperly installed, and it caused damage to a part of the vehicle under warranty. So make sure your backup camera system is properly installed, and you won’t have any issues.

6. Does your system start automatically or manually?

The choice is left for you. Our camera systems can be wired to either start-up once the reverse gear has been engaged, or they can be wired to be switched on by the driver. The system can even be installed to always ‘stay on’. Our backup cameras allow you the flexibility of choosing what you want.

7. Does your backup system offer distance lines?

Yes, most of our monitors offer a distance grid-line feature. The option is not always on, and can be switched on and off at will. In addition to these lines, some of our systems also offer audio capabilities. With a microphone integrated in the camera, and a speaker in the monitor, you can both see exactly what is behind you, and also take vocal cues from an assistant. These 2 features are designed to make your driving even safer.

8. Can I use your camera for backing up a trailer?

Yes, our systems are perfect as a backup help for trailers and other large vehicles. We have both wireless and wired systems, specifically designed for trailers. You can also have a camera installed between the towing vehicle and the trailer, and use it to monitor the hitch. Other trailer-towers even leave their backup cameras constantly on behind the trailer, and use it to monitor oncoming traffic.

9. Will your camera work with my car’s navigation system / head-unit?

We have both wired and wireless backup cameras. If your car’s head-unit accepts RCA video connectors, then it will work with our wired cameras. If it features a wireless video reception capacity, then it will work with our wireless cameras. We also offer WiFi cameras, which are deigned to wirelessly transmit video to smartphones and other WiFi-enabled devices.

10. Is an instruction manual included?

Yes, we always include a user guide in every package that we ship.

More Questions?

The above questions are the most frequently asked questions, concerning our backup video products. You might possibly have a different question, which is not listed above. In such a case, please do not hesitate to contact us. We will gladly assist you.

How to Make Rear View Backup Camera Always Be On?

There are people who need a backup camera system that only comes on during reverse, and those who want it to stay constantly on. Some backup camera systems are designed specifically for reversing, but there are also systems that are designed to always stay on.

So, the simple answer is: Yes, backup cameras can constantly stay on, if you wire them correctly. Following are 3 popular wiring methods, to have an ‘Always On’ backup camera system:

wireless rear view camera kit system

1. Constant Power Supply

You can connect the camera to a constant power source, and simply have it always on. The cigarette lighter socket, is the most convenient way of doing this. You could also get the power straight from the fuse box, although you will need to know exactly what you are doing.

One advantage of having your backup camera system always on in this way, is that you can use it as a security system, if your monitor has a video recording function. The disadvantage is that your vehicle’s battery could get drained, when you don’t use the vehicle for a while.

2. Connected to Ignition

It is also possible to connect the camera or camera system to the vehicle’s ignition. Using this method, the camera will only come on after the engine has been started.

This method protects the vehicle’s battery from being drained, and is also a very popular ‘Always On’ camera method, used in commercial delivery vans and trucks.

The connection does not have to be directly at the ignition. Simply connecting to any device or cable, which is controlled by the ignition system, is sufficient.

3. Manual Switching

The third method is the use of a button to switch on the camera at will. This means that the system will be directly connected to a power source like in method #1, but the cables will then be run through a switch.

When connected this way, the system can be switched on, either with a running or a stopped engine. One advantage of wiring the camera this way, is that you have absolute control over it.

The disadvantage though, is the risk of battery drain, whenever you park the vehicle and forget to switch of the camera system.

Precautions

When you decide to install an ‘Always On’ backup camera system, there are certain issues to consider, so that you can avoid unforeseen problems. These include:

  • Fused Power Sources: Cigarette lighter sockets are usually fused. This means that your devices will be safe in the event of a power surge. If you decide to connect directly, then make sure that the power supply is fused. If you fail to use a fused power source, then you risk damaging your backup camera system.
  • Adverse Weather: Adverse weather conditions are a certainty. When installing an ‘Always On’ system, you are best advised to use a reliable camera, which is proven to withstand extreme weather conditions. This way, nothing will stop your camera from staying on.
  • Battery Drain: This one is a little tricky. If your camera system stays on after you have killed the engine and parked the car, it will continue to use energy from the battery. It’s hard to say how long it will take before a vehicle’s battery will be completely drained, but it’s safer to not leave the car unattended for more 2 days.

Our System Can Handle It!

Our backup camera systems undergo many rigorous tests before leaving the factory. This makes them ideal for tough-jobs like this. All of the possible conditions that could lead to a faulty backup camera system, have been tested and passed, allowing you to install our products with full confidence.
more information

Conclusion

Yes, backup cameras can always be on, you just need a good quality product and the right installation skills. If you have any further questions concerning backup cameras, or if you would like to inquire about our systems, please do not hesitate to contact us.

Top 5 Truck Rear View Cameras In 2017

This multi-product review is based on the following top truck rear view cameras :

#1. VS824:120°automatic shutter truck rear view cameras with 12 infrared illuminators.

#2. VS802:The double RV backup camera with 30 infrared illuminators.

#3. VS803:130°Backup Camera with 18 infrared illuminators.

#4. VS801:Heated Backup Camera with 28 infrared illuminators.

#5. VS466:Backup Camera with 9 infrared illuminators.

When considering different products for purchase, it is therefore necessary to know the important features or attributes of the particular rear view camera.

These major features include:

– Price

All the five cameras in this rear view camera for truck and trailer review, lie in a price range between $69 and $129.

This price range is acceptable for a backup camera, although the more important issue to look out for are extra features.

Some extra features can be expensive, but if it serves your needs, then the camera’s price should be worth it.

The number #3 camera, the 130 Backup Camera with 18 Infra-Red LEDs is the cheapest system at $69, while the #2 and the #4 cameras both cost $129.

– Video Resolution

Video resolution is another reference to the quality of any backup camera system.

In simple terms, more is better.

A higher resolution always produces better pictures on any monitor.

When we compare the video resolution of these backup cameras in TV-lines, camera #1 offers 480 TV-lines, while cameras #3 and #5 both offer 600 lines, with camera #4 topping the line with 700 TV-lines.

Based on simple video quality alone, camera #4 appears to be the best, but it is also one of the costliest cameras at $129.

– Night Vision

Night Vision capability is available in all five reverse cameras, but while camera #5 comes with just nine infra-red LEDs, camera #2 tops the list again with 30 infra-red LEDs.

The number of infra-red LEDs or IR-LEDs (Light Emitting Diodes) determines to a large extent, the quality of the camera video.

The IR-LEDs emit heat waves which although are invisible to human eyes, can be easily picked up by camera sensors as they bounce off of objects in the environment.

Rear view camera lenses can be sensitive to objects as far away as 60 ft. (18 meters) using this technology.

– Field of View

The field of view is a measure of how wide the backup camera can literally see, and the size of this angle is actually a result of the camera’s lens.

All the five truck rear view cameras in this review have either 120°or 130°viewable angles, so no single camera excels better than the rest in this respect.

In theory, a camera can have a 180° field of view or even higher using a fish-eye lens, but the picture will be distorted at the very least.

One exception here is camera #2 which is a dual camera setup.

The dual rear view camera system allows you the freedom of monitoring more angles than are possible with a single camera.

– Operating Temperature Range

Cameras #1, #2, #3 and #5 are rated to operate between -40 and 133 .

Camera #4 comes with an integrated heater, which allows it to perform perfectly well in cold weather conditions as low as -49 .

This places camera #4 as the ultimate camera system for very cold regions or countries.

– Water Proofing

Water proofing of the backup camera system is equally important since they are electronic devices, and will immediately break down once wet on the inside.

All the five cameras in this review are waterproof and also dust-proof.

Cameras #3 and #4 even have the highest weatherproof rating, which is IP69K, and which guarantees against most adverse weather conditions, including high pressure water splashes.

– Extras

Most of the reverse cameras come with standard features, except for camera #2 and #4.

Camera #2 is a dual lens camera, which makes it possible to monitor a truck’s rear in ways that are not possible with a single camera.

Cameras #3 and #4 come with a microphone, so that you can also hear what is happening behind.

As well as a light sensor, with which it adjusts the strength of the infra-red LEDs depending on how much light is available.

– Warranty

All these truck rear view cameras come with a 1 year warranty included.

A Closer Look at Each Product:

Camera #1-VS824:120°automatic shutter backup camera with 12 infrared illuminators.

This 120°rear view camera is a standard camera that can be easily and quickly installed on the back of your truck, RV or bus.

It is designed to be connected using wires to a monitor system of your choice.

One outstanding feature of this camera is its motorized shutter which automatically opens and closes when the camera is either turned ON or OFF.
auto shutter backup camera

shutter rear view camera for truck

auto shutter rear view camera

more information
It also comes in a durable and weather proof casing that ensures its longevity and good service, with the casing protecting it from rocks, pebbles, wet storms and road bumps.

This truck rear view cameras also includes night vision capability.

Its CMOS lens is aided by 12 infra-red LEDs which beam enough infra-red rays at night for the camera to pick up objects as far as 60ft(18m) away.

It can be vertically adjusted up to 180, and although it offers 480 TV-lines, its 250 to 1 contrast ratio helps to produce high quality videos.

The camera pack comes with all the cables necessary for its installation, which is fast and uncomplicated.

Its power supply is also a simple 12 Volt DC,and the power cables are enclosed inside the camera’s major cable.

Pros

– 120 view is wide enough.
– Automatic shutter that protects the lens when not in use.
– Affordable price.

Cons

– You need additionally to connect the green wire to the reverse lights to enable this shutter function.

Box Contents

  • 120 Automatic Shutter Backup Camera
  • 20 meters installation cable
  • Installation Screw-kit
  • RCA adaptor and wires
  • User’s manual

Camera #2-VS802: The Double truck Backup Camera with Individually Adjustable Lenses

Camera number two has been specifically designed to solve a particular problem, and so it comes with two lenses.

A dual lens rear view camera can be quite useful for truck drivers and others with trailers as well.

Each of the two lenses are adjustable, so one lens can be used to monitor a trailer’s hitch, while the second monitor can be used to monitor oncoming traffic.

The system is also helpful for backing up.

You can either monitor your video feed using a monitor that switches between camera-1 and camera-2, or you can use a quad monitor system to view both video feeds at once.

The casing has also been built using the toughest of materials, and is thus weatherproof and guaranteed to last a long while.

The military grade night vision ensures that you get high quality videos at night.

This system will also work while you are reversing and it offers the option of displaying mirrored images.

It delivers high quality images with 600 TV-lines, with a contrast ratio of 250 to 1.

Each backup camera can be vertically adjusted up to 180 and its infra-red LEDs provide enough night illumination for up to 60ft. (18m) of clear videos.

Each of the lenses additionally has its own yellow RCA video output and a red power connector in the back for easy installation.

Pros of The Double Backup Camera

– Enables different views to be monitored at once.
– Each individual lens can be vertically adjusted up to 180.
– Offers Mirrored Imaging

Cons

– The price is the highest among these 5 cameras , but when considered to be the price of two cameras, it immediately becomes attractive.

Box Contents

  • Double Backup Cameras
  • 2x 20 meters Installation Cable
  • 2x RCA adaptor and wires
  • Installation Screw-kit
  • User’s Manual

double lens reverse camera

double lens truck backup camera

more information

Camera #3-VS803: 130°Backup Camera with 18 Infra-Red LEDs.

Camera #3 is the lowest priced camera in this review, costing just $69.

Although cheaper than the other truck rear view cameras, this one comes with lots of good features, including a 130 viewing angle, 18 infra-red LEDs, which enable clear visions of up to 50 ft.at night, and an adjustable sunshade.

This particular camera is a perfect security enhancement for all drivers who need an entry level back up camera in their trucks or buses, without having to spend too much money for it.

For its price, it’s also a high quality product and offers therefore good value for your money.

With 600 TV-lines, you will have a good and clear overview of the backside of your automobile, including at nighttime, using infra-red.

The 18 infra-red LEDs produce enough illumination for crisp-clear vision at night.

This system also has an IP68 rating, which means it can weather most severe weather conditions, like withstanding high velocity stones, high pressure water and jolts of all kinds.

It also has a built-in microphone, so you can hear what you are seeing, and an automatic iris-sensor, which helps to adjust the intensity of the infra-red beams based on how bright the day is.

Pros of The 130°Backup Camera with 18 Infra-Red LEDs.

– has an adjustable sunshade.
– comes with a built-in microphone.
– It has an IP68 weather-proof rating.
– is affordable.

Cons

– this is one of the most common truck rear view cameras on the market.

Box Contents:

  • CCD Weatherproof and Infra-red Camera
  • 20 meters extension cable
  • RCA adaptor and wires
  • Installation Screw Kit
  • User’s Manual

universal back camera

heavy duty backup camera

more information

Camera #4-VS801: 120° Heated Backup Camera with 28 Infra-Red LEDs.

This is another specialized backup camera, and it was specifically devised for any driver that has to deal with extremely cold weather.

Offering the possibility to continue functioning down to temperatures of -49°C.

This camera can turn out to be a life-saver in areas of the world where extreme cold, including cold-storms usually
threaten the safety of large automobiles on the road.

The heater prevents the buildup of ice or snow flakes over the camera lens, and the IP68 rating of the system guarantees a long and trouble-free product life.

There are a total of 28 infra-red LEDs, which provide optimum illumination for the camera at night, even in the coldest of temperatures.

It also features a built-in microphone for hearing what you are seeing behind you.

An automatic sensor for regulating the intensity of the infra-red beams, based on daylight intensity, and 700 TV-lines to provide crispy-clear visuals on your monitor.

Its 1/3 inch imaging chip is a Super HAD CCD chip from SONY?, which renders its high quality images with a 120 viewing angle.

The video stream can either be viewed in NTSC or PAL capable monitors, and the whole unit consumes a maximum of just 300 Milliamperes of current, at 12/24 Volts.

Pros of The 120 Cold Weather Heated Backup Camera

– features a heater and so, can function at low temperatures down to -49°C.
– It is IP68 rated.
– comes with 28 infra-red LEDs.

Cons

– It’s a bit pricey.

Box Contents

  • Heated Color Camera with 28 Infra-red LEDs
  • 20 meters extension cable
  • Installation Screw Kit
  • RCA Adapter and Wire
  • User’s Manual

backup camera for truck

28 lights backup camera for truck

truck backup camera system with 28 IR lights

more information

Camera #5: 120°Backup Camera with 9 Infra-red LEDs.

The fifth product in this review comes with 9 infra-red LEDs, a 120 viewing angle and an adjustable sunshade.

Both the sunshade and the rest of the camera’s casing is built using a heavy duty zinc alloy for the safety of the internal components.

It has an Ingress Protection (IP) rating of IP68, which means it is dust proof, and can as well withstand being submerged in water.

It also has a 20 G vibration rating, enough to withstand much of the rattlings and shocks of being attached to a truck, for instance.

Its imaging chip, which is a 1/3 inch Sharp CCD sensor delivers 600 TV-lines of video imagery.

This video is available both as NTSC or as PAL video encoding.

The video stream is of good quality, even at night, with up to 50 ft. of visibility using infra-red.

The camera also uses 12 Volts of electricity to run, and comes with an RCA connector.

Pros of The 120°Backup Camera with 9 Infra-red LEDs.

– Made from heavy duty Zinc alloy for maximum protection of internal components.
– Delivers 600 TV-lines of clear video imagery.
– Comes with an adjustable sunshade.

Cons

– Compact size, not suitable for very big vehicles.

Box Contents

  • 130 Backup Camera with 9 Infra-red LEDs.
  • 20 meters extension cable.
  • RCA Adapter and Wire.
  • Installation Screw Kit.
  • User’s Manual.

truck backup camera

backup camera with 9 IR lights

more information

The Verdict

It’s a fact that the use of truck rear view cameras and other large automobiles, increases the overall safety of the vehicle.

Buying and installing the camera kit becomes a responsibility for you, although you will have to make the final product choice by yourself.

This choice depends on your specific needs. So if for example, you drive in a very cold region, then you simply need camera #4.

If you often hitch a trailer, then camera #2 should be ideal for you.

Else, if you just need a cost-effective truck rear view cameras for your truck, then camera #3 should do.

Important Product Features for This Review

The goal of the rear view camera for trucks and other large automobiles is to improve safety during backups, as well as other periods when a good view of the back of the truck, bus or RV is necessary for safety purposes.

Because an understanding of these differences will help you to purchase the right camera system.


Wireless Backup Camera System Troubleshooting Guide

Wireless Backup Camera System Troubleshooting guide

When it comes to wireless backup camera systems, the majority of the problems can be categorized under 3 major groups, they are:

1. No Display Issues (Backup camera system is not working, no display on monitor.)
2. Image Quality Issues (Backup camera system is working, but image quality is bad.)
3. Miscellaneous Issues (Other problems.)

By understanding the problem with your vehicle’s wireless backup camera system, and knowing which of the 3 groups it fits into, you will be better equipped to deal with the situation.
wireless rear view camera kit system
Following are troubleshooting topics for each of the 3 groups.

1. No Display Issues

If your wireless backup camera system suddenly stops working, or if you have just installed it, and done everything correctly, but you are seeing no images on the display, then it could be caused by any of the following:

– Monitor Issue

The problem could be from the receiver/monitor and not from the camera/transmitter side of the system.

This means that you should check that the monitor is properly connected with a power source, and that you can power it up.

If you cannot power it up or if it displays any error message, then the monitor is most probably the culprit.

If the monitor powers on, and you can see that it is working, but you are not able to receive any signals, check to see that its antenna is not broken and that it is properly connected to the monitor system.

– Camera/Transmitter Issue

If the monitor is alright, and the problem persists, then the camera/transmitter could be the culprit.
digital wireless backup camera system
In this case, you should carry out a physical check of the camera module in your vehicle’s rear.

Check to make sure that the antenna is intact, and there is no physical damage of any kind to the module.

If there is no physical damage to the camera/transmitter, but it was previously functional, then its electronic components must be defective. If you are installing it for the first time, then check if you can receive its signal with another monitor or not.

– Connection Issues

It might happen that both camera and monitor are working perfectly fine. But they are not communicating with each other.

If you use an extra receiver module, then check that it is properly plugged into the monitor’s correct channel input. You could also try changing to another input to see if it works.

If the monitor integrates the receiver, then there could probably be pairing issues.
7 Inch Digital Wireless Backup Camera System
Different systems have different pairing and unpairing methods, so check your backup camera’s user guide, for pairing instructions.

2. Image Quality Issues

Your vehicle’s wireless backup camera system could be working, but there are problems with the quality of the image displayed on the monitor. In such a situation, check the following:

– Wireless Interference

One drawback of wireless systems, including backup camera systems, is interference.

Since wireless signals travel in the open air, and many gadgets utilize the 2.4Ghz and 5Ghz frequencies, any baby monitor, cordless phone, wireless security camera and wifi-router in the vicinity of your vehicle will cause a level of signal interference.

The possible remedies to wireless interference include disabling the second signal source, removing the signal source from the vehicle’s vicinity, and completely vacating the area, if access to the source of the interfering signals is out of reach.

If you are using a camera system with a separate transmitter module, then you could also try bringing the transmitter closer to the monitor, while leaving the camera in its position.

– Dirty or Smudged Images

Environmental influences can also cause a signal deterioration. Such influences include dust and mud, which could either partially or entirely block the camera’s view. Other situations like rainstorms can also degrade a wireless backup camera’s quality.

If the monitor’s image looks dirty, try wiping it with a piece of cloth. If you are experiencing adverse weather conditions, have some patience.

– Faint or Grainy Images

If, for some reason, your monitor displays faint images, or faint and grainy images, then you might have a weak signal problem.

This is especially true with analog wireless camera systems. Most wireless backup systems have ranges up to 150 feet, but it is usually in a line-of-sight situation.

If there are serious or thick obstacles between your camera/transmitter and your receiver/monitor, then you have to reduce the obstruction, or simply bring the two parts of the system closer.

3. Miscellaneous Issues

– System Not Working with Reverse Gear

Most modern backup camera systems are designed to switch on only when the reverse gear has been engaged.

If your monitor is constantly on, then you have not connected the system properly.

There are usually 2 cables for power (+ and -), then there is a reverse detection wire. You have to power the monitor with the 2 power cables, then connect the reverse detection wire to the reverse light of your vehicle.

This reverse cable can either be from the camera, if the monitor is designed to receive reverse signals from the camera, or the cable can run straight from the monitor to the reverse light.

– Monitor Flickers When Not In Reverse

If your monitor displays well when you are in reverse, but flickers when you are not in reverse, then you need to check your vehicle’s wiring.

This usually happens in older systems without a reverse detection wire, where either the camera or the monitor will be powered directly from the reverse light cable.

Some reverse wiring will act funny when a bulb blows for example, and there will be a few volts available on the cable.

This voltage might not be enough to power on the monitor, but it will be just enough to make it flicker.

– No Infrared Images

If it is night and you are not getting any infrared images, then there is probably too much light behind you.

Infrared systems require darkness to work well, and they even have a sensor that only switches on the infrared led-illuminators, only when it is dark enough.

Conclusion

We have come to the end of this wireless backup camera systems troubleshooting guide.

Since manufacturers and wireless backup camera systems vary, there might be situations that you are experiencing, which is not explicitly listed above.

In such a case, you will be well served to use your imagination, based on the guidelines above, to solve the problem.

14 Things You Need To Know About Wireless Backup Camera Systems

If you are unsure about anything concerning wireless backup cameras, then read on as we delve into the 14 things you need to know about them.

1. What are wireless backup cameras exactly? Technically speaking?

If you should look at the wireless backup camera from a technical point of view, then it is simply a camera with a transmitter circuit, which takes the visual information that the camera’s lens is picking up, and modulates it into radio waves.

These waves can then travel for a certain distance, before getting picked up by a receiver.

A receiver is equally any electronic device that can pickup the information being broadcast by the transmitting device.
digital wireless backup camera system
A receiver is simply made up of a resonant circuit, whose resonant frequency must be set to that of the transmitter.

The information is picked up, amplified, and then turned back into video data.

When this video data is viewed using the vehicle’s on-board monitor, we then see the video from the backup camera.

2. How Wireless backup Cameras Transmit

Waves can be modulated at any time, either intelligently or not.

In order to successfully transmit useful video data, the wireless camera device will have to adhere to certain industry standards. Such standards include video encoding formats such as VGA, PAL or SECAM.
digital wireless backup camera system VS736

more information
Other standards to be followed are those which deal with wireless protocols.

These are for example Frequency Modulation and Amplitude Modulation, as well as WiFi protocols like the IEEE 802.11b or IEEE 802.11g.

It is only by making use of these protocols and formats during transmission, that another device can be said to be compatible with the transmitter.

There are also frequency bands that have been designated for such applications, like 900Mhz and 2.4Ghz.

There are video resolutions like 720p (HD), 1080p (Full HD) and 1440p (Quad HD) as well.
7 inch wireless backup camera system

more information
So long as a wireless camera works and transmits data based on these standards and protocols, any other standards-compliant monitor will be able to capture and display the video feed.

3. Types of Wireless Backup Camera Systems

There are two types of wireless backup camera systems. They are the analog and the digital systems.

Analog systems are an older form of electronics, which simply have a continuously variable signal.

This signal is then encoded and used to modulate the airwaves, and therefore gets transmitted thereby.

This is in contrast to digital systems, which either have a positive or a negative bit.

Analog transmitters have been used successfully for a long while, but they have their limitations.

These include their inability to successfully transmit data as far away as digital transmitters.

Due to the design of analog transmission systems and the standards that analog electronic systems have to comply with, there are also resolution and video quality limitations to be found in wireless analog transmissions.

Furthermore, analog systems are more prone to signal interference than digital systems.

This is because an analog signal is a continuous wave at a given frequency, that is modulated with data, analog wireless backup camera systems are vulnerable to bad weather conditions, as well as to interference from other camera systems or gadgets, which transmit on the same frequency band.

The rain or thunder could disrupt the signal, an Internet router or a security camera could disrupt it as well.

This makes it impossible to guarantee a 100% interference-free, wireless signal, given that wavebands could get overloaded. While a digital system is made up of individual pulses, with each pulse representing a bit.

The bit-pulses of a digital backup camera are easier to recognize than the fine modulations of an analog system. This makes analog transmissions less far reaching than a digital transmission.

4. The Wireless Range

Wireless backup camera systems typically have a range of about 100 feet. This range is enough for most applications, considering that the majority of vehicles and trailers do not exceed 40 feet.
wireless rear view camera kit system

more information
The best positioning of a wireless transmitter and the receiver, is in a clear line-of-sight arrangement.

If you experience a weak signal reception for any reason, then you should check to see that there are not too many factors limiting the transmitter’s range.

The possible culprits include reflections, scattering, attenuation, diffractions and refractions.

In order to improve the range or signal quality, you have to make sure that there are as little reflective surfaces as possible, which may block the receiver’s clear line-of-sight of the transmitter.

You also have to check for irregular surfaces, which may cause the signal to scatter.

The third signal strength limiter is diffraction, which occurs as a result of the signal changing direction as it passes through glass.

Attenuation is caused by a weakening of the signal strength as it passes through a material object, so make sure that there are as little solid surfaces as possible, blocking the receiver from the transmitter.

5. Signal Quality and Interference

There is no huge, noticeable difference between the signal qualities of a wireless backup camera system, and that of a wired system.

All things being equal, both systems will display equally good images, with the wireless system being prone to occasional interference.

This is understandable, given that wireless signals can be interfered with in a number of ways, unlike a wired system.

6. Ease of Installation

The beauty of wireless backup cameras lies in their ease of installation. Wired cameras can sometimes be a challenge to install.
wireless reversing camera system

more information
Depending on the type of vehicle, you may need to run wires either underneath or inside the vehicle.

From pickup-trucks to recreational vehicles and other trailers, there is no single or universal method of installing a wired backup camera.

This makes every new installation a potential uphill-task.

With a wireless backup camera, there is no need to run wires.

In fact, installation is as simple as fixing the camera behind the vehicle, and then turning on the wireless receiver, and that’s it.

Different vehicles have different power-lines in different locations, you just have to find out what your vehicles offers, and make the best out of it.

Apart from this issue of electric power from the vehicle, the installation of a wireless backup-camera system in any vehicle, is as easy as A-B-C.

7. Video Resolution and Picture Quality

Resolution refers to the amount of pixels both picked up by the camera, as well as displayed by the monitor.

This determines how crispy clear the image will appear, as well as how much information can be picked up easily from the monitor.

The resolution begins with the camera’s sensor. If the sensor cannot deliver high resolution images, then the rest of the system will suffer.

The transmitter module, the receiver and the display module must also be able to individually handle the current video resolution level.

Older analog systems basically have a lower resolution than newer digital systems.

There is the 720p resolution with 1,280×720 pixels, which is commonly referred to as High-Definition or HD resolution.

Many analog backup camera systems work with this resolution. There is also the 1080p resolution with 1,920×1,080 pixels, commonly referred to as Full-HD. Most digital backup camera systems work with this resolution.

There are other video resolutions, but they are not as popular in backup camera systems, as the above resolutions.

These other resolutions include the 1440p or Quad-HD with 2,560×1440 pixels, the 2160p or Ultra-HD with 3,840×2,160 pixels, and the 4320p or Full Ultra-HD with 7,680×4,320 pixels.

8. Cool and Trendy Gadgets

Wireless systems can also be more aesthetically appealing than wired systems.

The attachment of an antenna to any gadget immediately boosts its looks and perceived value, especially with technology lovers.

Although looks are not everything, it is a fact that antennas actually help a wireless gadget to send and receive better signals.

So not only do wireless backup camera systems look better with their ‘geeky’ antennas, they also actually work better.

9. Purchase Price and Installation Costs

Although they were initially more expensive, wireless backup camera systems now cost almost the same price as wired systems.

You can actually find systems in the market that include both camera and monitor currently costing between $30 and $300.

This price range is both for wired and wireless systems, but when you compare other features side by side, wireless systems will tend to be a bit more costly.

The extra cost should not worry anyone much, because when it comes to installation, the wireless system becomes the cheaper of the two.

This is because of the possible difficulties that can arise when installing a wired system, depending on the type and make of the vehicle.

With a wireless backup camera system, you have very little to worry about, because there is no need to run cables from the back, all the way to the dashboard.

10. Flexible and Versatile

The era of the wired back-up camera has lasted long enough. As is normal with technology, inventions and developments will go on for a while before reducing or ceasing.

In this current era of the wireless backup camera, there is hope, as we all anticipate new developments and technological innovations based on the current technology.

As computers and other electronic devices become smaller each year, many new uses will continue to come to mind.

More and more opportunities will be discovered for the ever smaller and portable devices.

When it comes to the area of backup cameras, this wireless variety sure seems to be more compatible with the new generation gadgets which are all as wireless as possible, including bluetooth and WiFi technologies.

11. Digital Wireless Backup Camera Systems

Digital wireless backup camera systems are those which use bits to function. Instead of a continuous signal as with analog systems, digital systems use bits to store information.

Each bit can either be set to 1 or 0, which equally means TRUE or FALSE in logic.

They are then grouped into larger sizes to comprise Bytes, Megabytes and Gigabytes.

The development of digital systems opened up many possibilities with electronic systems, including backup cameras.

With the help of digitization, precise video resolutions have been developed and standardized, such as the HD, FULL-HD e.t.c.

This has allowed an ever more increasing video quality for both cameras and the display monitors.

In a digital video broadcast for example, each of the 1,920×1,080 pixels of a Full-HD video frame, about 2 million in total, is assigned an RGB value.

This stands for Red, Green and Blue. Each of these three colors is assigned a number of bits, either 8, 16 (referred to as high color), or 24 bits (referred to as true color), or 30, 36 and 48 bits, which are referred to as Deep Color.

12. Easy to Connect Many Cameras Simultaneously

With a wireless backup camera system, you can easily setup as many cameras as you like.

Such a scenario is not as easy with wired systems, where you have to pass individual wires for each camera.

The different camera signals can be easily transmitted on different channels.

Many wireless backup camera system receivers can handle up to 4 video channels simultaneously.

13. Receiver System

The receiver is the part of the system that sits inside the vehicle, mostly on the dashboard.

It receives and displays the video stream being broadcast by the camera in the back.

The receiver is made up of a receiver module, which picks up the transmitted data using resonance.

It also consists of an encoding module, which recreates the data into a video stream and also adds modifications like timestamps and channel numbers where necessary.

Finally, there is also a display module, which is the video screen that most of us see.

A matrix display controller is a module that collects the received and encoded data, and then uses it to create the images that you see on the monitor.

Some receivers take things further by including more than one channel.

Most of such receivers though, can receive data from four different cameras simultaneously.

The receiver system will also include a system for power delivery. Since it requires a Direct Current electricity supply, it is normally drawn from the vehicle.

This happens using either a cigarette socket charger, delivered together with the system, or an installation expert can do a more professional install, in which case the wires will not be visible.

The receiver housing will also contain buttons for changing channels, volume control and miscellaneous functions.

14. Smartphones, WiFi and the Future

The addition of a wireless module in wired backup cameras, to create a wireless backup camera system, is a technological improvement over the wired system.

As we can all attest to, technological advancements are never-ending.

Every new day, month, or year, brings about new developments that improve on the previous standards.

The same can also be said of the wireless backup camera system.

With the development of wireless transmission and reception came other improvements in the backup camera.

The original signals were analog, but then came digital data transmissions, and with that, other developments like WiFi backup cameras, which transmit encrypted data digitally, and can be received with any WiFi enabled device like a smartphone or tablet.

This development is only possible because of the development in the mobile and computing industries, which have created a universal mobile device we now call the smart-phone.

Still, it is left only to the imagination, to try and figure out where technological developments will take us in the future, and what ultimately, the backup camera will evolve into.

The Top 7 Gadgets Every RV Owner Should Have

The Top 7 Gadgets Every RV Owner Should Have

1. Cellphone Signal Booster

Cellphones are a very important part of our lives, although their signal reception varies from place to place.

The further away you go from civilization, the less the cell service you will get.

So, as long as you RV, you will definitely find yourself somewhere someday, without enough cellphone reception.

The simple solution to such a problem is to use a cellphone signal booster.

What this does, is that it uses an antenna placed outside the vehicle to receive nearby cell signals, and then it boosts the signal’s strength and rebroadcasts them using a second antenna inside the vehicle.

There are different cell signal boosters for large halls, small vehicles, trucks and RVs.

Each has their different specifications and signal strengths, to match the target conditions. This makes it necessary to get a package that is specifically designed for an RV.

Pros:
• Boosts the signal reception of your cellphone tremendously.
• One time purchase only, no subscriptions and no bills.

Cons:
• You will get no signal if you go too far away from civilization.

Average Price: $200-400

2. Backup Camera System

Backup cameras are slowly becoming mandatory in vehicles. According to research, they actually improve the driver’s safety standard, and help thereby to save lives.

Backup cameras are even more important for RVs, trucks and other large or trailer-puling vehicles.
digital wireless backup camera system
They are two types of backup camera systems: the wired and the wireless types.

Wireless backup camera systems are easier to install, but their signals can be affected by severe weather conditions, and occasionally, by nearby transmitters. So digital wireless backup camera system is highly recommended.

Pros:
• Increases your driving safety during backup and while on the road.
• Prevents you from scratching or damaging your RV.

Cons:
• Low quality backup cameras can be susceptible to bad weather.

3. The 7-in-1 Pressure Cooker

A majority of RVers love to take things easy and have fun, and a 7-in-1 pressure cooker helps tremendously in achieving that desire.

This single device will replace your pressure cooker, your rice cooker, steamer, yogurt maker, warmer, and slow cooker.

You can cook a variety of foods in the 7-in-1 cooker, from meats to beans and rice, vegetables and stew.

The most popular 7-in-1 pressure cooker brand is Instant Pot, and it is available in 5, 6 and 8 quart sizes.

Average power consumption across brands is 900 Watts. The cookers are usually controlled using electronic programs, which allows you to just press a button and your cooking starts.

Pros:
• Can cook up to 70% faster than with conventional methods.
• Saves space and is easy to wash and maintain.

Cons:
• They use large amounts of electricity, making them best fitted for use in RV parks.

Average Price: $100-300

4. Tire Pressure Monitor

If your RV’s tires blow, then you have a serious problem that will probably cost you a few thousand dollars.

In addition, the risk of an accident is greatly increased when a tire bursts. In order to prevent such unwanted occurrences, you have to protect your tires from the root cause of preventable tire blowouts: high heat, under-inflation and overloading.

With a tire pressure monitoring system, you get 4 or six sensors, depending on your vehicle, which are attached to the tire’s valves, and send their readings to a portable computer.

The computer usually gets power from the cigarette lighter socket, while the sensors use batteries.

They send both temperature and pressure information in degrees Fahrenheit or Centigrade, and in psi, respectively. The computer receives it and displays the values for you.

Pros:
• They help you save your tires and your money.
• Tire pressure monitors can save lives by preventing accidents.

Cons:
• Sensors use batteries that need changing after a while.

Average Price: $100-300

5. Walkie Talkies

2-Way radios, better known as walkie talkies, can be quite liberating when RVing. When you find yourselves in an area with bad cell reception, and someone goes fishing or hiking, then you will be glad to have walkie talkies to communicate with.

They are also great for backing up your RV and communicating with someone behind.

Walkie talkies are simply a combination of a radio receiver and a transmitter.

They vary in sensitivity and power, and may have extra features like a digital display and audio channels. The pricier versions may even feature encryptions and other highlights.

They are normally sold in pairs, and it is always advisable to have an extra set of batteries around, or to buy a set with rechargeable batteries.

Pros:
• Free communication between partners, with no bills to pay and no subscriptions.
• Walkie talkies are fun to use.

Cons:
• They use a single channel for communication, so the talk and release system needs getting used to.

Average Price: $25-100

6. LED lighting

LED, which stands for Light Emitting Diode, has come a long way. Originally used in radios and other electronic devices as a signal light (usually red), many LED colors were further developed over the years.

With the development of the white colored LED, lighting applications started to change. Today, we have LED lights that can be used in place of halogen lights and others.

They additionally use as low as 10% of the energy that halogens use, while staying very bright.

This makes them great for many applications. LED lights do not generate heat, so you can use them inside your RV, like in summer for example, without fear of warming up the place.

LED lights also last comparatively longer and are less vulnerable to vibrations.

Pros:
• can save a lot of energy, up to 90%.
• They are cool to the touch, and will not heat up the RV.

Cons:
• a little costlier.

Average Price: $25-100

7. Solar Panels

Solar panels are made from semi-conductors, which generate electricity when sunlight shines on them. The panels generate direct-current electricity, which can either be used immediately, or stored in batteries.

A panel can produce anywhere from 10 watts, up to 200 watts, depending on its number of silicon cells.

You can also put together as many panels as you like.

The only drawback with solar power is that the initial costs are rather high, but they pay for themselves over time, plus they offer you the opportunity of having clean energy in remote, off-grid areas.

Depending on the size of the system, you can use your phones, tablets, laptops and even watch TV, all powered by the sun.

Pros:
• Provides free electricity without bills or a subscription.
• Can be very valuable if you go off-grid.

Cons:
• Their initial cost per watt can be substantial.

Average Price: $50 – $1,000 and over

Conclusion

Coming to the end of this list of the top 7 gadgets every RV owner should have, it is important to note that none of the gadgets is more important than the other. You should choose a gadget based on your needs and your individual situation. But if you desire to have the best quality time possible, then they all become necessary.

Tailgate Handle Backup Cameras for Ford, Toyota, Dodge & Chevrolet Pickup Trucks

This Multi-product review focuses on the following tailgate backup cameras:

1. Ford F150 Tailgate Handle Backup Camera(Product Model: VS150).

2. Toyota Tundra Tailgate Handle Backup Camera(Product Model: VS435).

3. Dodge Ram Tailgate Backup Camera(Product Model: VS452).

4. Chevrolet Silverado Tailgate Handle Backup Camera(Product Model: VS457).

The package comes with an OEM Ford tailgate handle, which contains an in-built backup camera, just like a factory-fitted one would.

This handle not only fits the F-150 tailgate, but will as well fit the Ford F-250, F-350, F-450 and F-550 truck models’ tailgates.

Ford F150 backup camera

Ford F150 backup camera installation guide

The package comes with the tailgate handle camera, installation cables and a screw kit.

The video output is standard and can be easily fitted to display on most standard monitors.

If your truck already has a video monitor mounted, then you are ready to go.

All you need to do is to fix the camera, then run the cables into your truck’s cabin, connect the video feed wire to your camera’s input, and you are done.

Pros:
170 degrees viewing angle.
Weatherproof camera system which is IP67 certified.
Night vision capability with 0.5 Lux minimum illumination.

Box Contents:
1x color & weatherproof Ford tailgate handle camera
1x 10 meters long camera cable in RCA connector.

more information

Toyota Tundra Integrated Tailgate Handle Backup Camera System.

Toyota Tundra is the newest of all the trucks in this review.

The Japanese truck puts up quite well with the other American trucks.

It is big and powerful, and definitely needs a backup camera as well.

Installation is easy and can be carried out by anyone with a technical inclination.

Your original tailgate handle will have to be exchanged for this new one which contains an in-built camera.

You will then have to run the wiring harness to the front of the truck, and into your cabin.

The wiring harness also contains a signal wire for activating the camera system once the reverse gear has been engaged.

Any compatible monitor can then be used to see the video feed.

One possibility here if you haven’t already bought a monitor, is to buy one with adjustable parking lines functionality.

This is because of the simple fact that this camera is not mounted exactly in the middle, so its parking guard line will always be slightly off.

For a large truck like the Tundra, this could mean some serious issues, but it can easily be corrected with a monitor that features adjustable parking lines.

Toyota tundra backup camera kit

Toyota tundra backup camera installation

more information

Dodge Ram Integrated Tailgate Handle Camera System

This one is specifically for Dodge Ram 4th generation trucks, starting from 2010 onwards.

The system includes a CCD camera with a 170 degrees wide viewing angle, and will enable you to easily upgrade your vehicle to a higher safety standard.

A tailgate handle camera is the best backup camera solution for trucks like the Dodge Ram.

It will enable you to gain the advantages of better rear vision, while being at the same time inconspicuous and quite cool.

It’s installation process is about the same with that of the Ford and Tundra camera systems.

It comes with a wire harness that you will simply have to run to the front of your truck after installing the tailgate handle.

You are free to add a reverse trigger, as well as add other extras to your system, including a monitor with adjustable parking lines functionality, in order to increase the camera’s parking guard lines’ precision.

When set up properly, this camera system can be so beautifully integrated into your truck, like it were factory fitted.

dodge ram backup camera

dodge ram backup camera installation guide

more information

Chevrolet Silverado Integrated Tailgate Handle Backup Camera.

The Chevrolet Silverado is among the largest trucks you can drive around in.

It is huge, full of power, and truly American.

Yet as a result of its large size, backups can be quite problematic in confined spaces or in areas with obstacles.

The solution to the problem is of course, a backup camera.

And which better place to have it installed, than in the tailgate handle.

You can of course have your Silverado factory fitted with a tailgate handle camera.

But if you missed out on that, then you can use this OEM kit to install a truly identical system, which incidentally, is also cheaper.

It features a color video output, a great night vision capability, a mirrored image functionality, and it is 100% weatherproof.

Unlike the other systems in this review, this camera has a minimum illumination of 1 Lux.

It comes with a 15 ft. long installation cable, an instructional manual and an installation kit.

The installation is straightforward like with the other systems.

It will work with most video monitors and you can set it to either be always on, or to be only switched on when in reverse.

A video monitor with adjustable parking lines can also be of much advantage.


Toyota Tacoma backup camera kit

toyota tacoma backup camera tailgate handle camera

more information

Following are the major features of tailgate handle backup cameras:

-Perfect OEM Fit
There are many different styles of backup cameras, including number-plate and roof-mounted models.

OEM, which stands for Original Equipment Manufacturer, is used to market products of equal quality or engineering, to original brand name products, although the OEM product will not include the brand name.

With tailgate handle cameras, this means that you will be receiving a tailgate camera that is at the very least, 99% compatible with the original camera system that your truck’s maker installs.

-Video Resolution
Video resolution refers to the number of image pixels in the video feed, defined as the number of horizontal pixels multiplied by the number of vertical pixels.

It determines the quality of the picture, because the higher the resolution, the clearer the image will be.

All cameras in this review have a 648×488 pixels resolution, which is enough to produce crystal clear images in most video monitors.

-Night Vision
Night vision capability in a truck backup camera can be quite beneficial.

By using infrared LEDs to illuminate the night, the image sensors can pickup even more infrared heat signatures as they bounce off objects.

This is transformed into a human viewable image, thereby making night vision a possibility.

-Weather Proofing

All four cameras pass the ip67 rating, and can withstand rain, water splashes, and dust.

They can also withstand rock impacts and other harsh weather conditions.

-Field of View
A camera system’s field of view refers to how much visual imagery or information that the camera lens can pick up and relay as video.

A camera’s field of view is measured in angles, and for purposes such as a backup camera.

Wider view angles are better because they capture more information and relay them to the monitor.

Such extra information can save lives in certain situations.

Three of the cameras in the review have 170 degrees wide viewing angles, while the Chevrolet camera has a 150 degree viewing angle.

-Warranty
All the four camera systems in this review come with 1 year warranties.

Being backed by a manufacturer’s warranty can be quite meaningful for a product.

Because it proves that the manufacturer is very confident in the design and engineering of said product.

Conclusion

If you are the owner or the driver of a big truck, then you must know the benefits of having a backup camera for safety purposes.

If your truck is a Ford F-150, F-250, F-350, F-450 or F-550, then the first camera system should be perfect for you.

Same goes for Toyota Tundras from 2007 to 2013, the second camera system will be their answer.

The Dodge Ram from 2010 onwards will benefit from the third camera, and Chevrolet Silverado trucks, from the fourth, and last camera system.

Best Wireless Backup Camera System Review

The wireless backup camera system is basically a backup camera which transmits its signals wirelessly, plus a video monitor, which receives wireless video signals, and displays it.

Such a system is perfect for RVs, 5th wheels, boats, trucks, minivans and SUVs.

One major advantage of using a wireless backup camera system, is that it can be very easily and quickly installed, without any need for installing wires.
wireless backup camera system VS736
more information

A Few Technical Details about the System.

Previous systems needed an extra video transmitter attached to the camera, or a special receiver attached to the monitor.

But this system integrates both a video transmitter in the camera, and a video receiver in the monitor.

The monitor is a high definition LCD monitor and thus delivers very clear images.

You can also choose to connect the camera’s power wires to the reverse light in your camper, 5th wheel, truck or other vehicles.

This will enable the camera to automatically switch on when you change into reverse gear.

The alternative method is to use batteries or any other power source, to transmit constant video signals, and not just during backup.

Features of the Wireless Backup Camera System.

Following are the features that make this system the best wireless backup camera system in the market.

It’s these individual combinations put together, that make it the unique product that it is.
wireless backup monitor

Here are the features:

– Colored Images

This wireless backup camera system captures and delivers images in full color.

While older systems could only deliver black and white images with some effort, this system effortlessly delivers high quality color images captured by the camera’s CMOS lens, and correctly reproduced by the LCD monitor.

– 70ft. Transmission Range

Simply having an inbuilt video transmitter is not enough, because all transmitters are not made equal.

Some are better or more powerful, like the transmitter in this system’s camera, which can beam its signals up to a distance of 70ft.

This guarantees good reception by receivers in all kinds of vehicles, including boats that are over 60ft.
wireless rear view camera

– Night Vision Capability

An additional feature is the military grade night vision capability offered by the system.

The camera includes infrared LEDs, which can illuminate the night with rays that are invisible to the human eye, but which the CMOS camera can pick up from distances up to 60 ft. (18 meters) away.

This enables you to drive and backup safely at all times of the day, including in pitch-black darkness.

– 100% Weatherproof Camera

The monitor is meant to be inside and thus protected from the elements, but the wireless camera is on the outside, and thus exposed to the elements of nature.

For this reason, the camera is housed in a rugged, die-cast aluminum housing, and even includes a sun shield also made from metal.

It can withstand rain, sun and direct hits from rocks.

It can also work in the most diverse of temperatures, ranging between -40 Celsius up to 133 Celsius.

– High Definition CMOS Camera

CMOS camera lenses may not be as popular as CCD chips but they offer many advantages.

CMOS is cheaper to manufacture, it is smaller and above all else, it uses less energy.

This makes CMOS camera sensors the better choice for cameras that run on batteries.

The camera delivers a total of 786,432 (1024 x 768) pixels of clear imagery, which is more than enough for the dash mounted 3.5 inch monitor.

– High Definition 5 Inches LCD Monitor

The LCD monitor is 5 inch sized, and offers a resolution of 1024 x 768 pixels, the exact amount of image pixels produced by the camera, and almost equal to the 720p HD standard of 1280 x 720 pixels.

It comes with a mounting solution that allows it to either be mounted on the dashboard, or to be hanged from either the roof or the windshield.

This added flexibility makes this wireless backup camera system even more valuable, because it can be installed in a wider range of vehicles.

– A Versatile Monitor

The monitor offers a total of four video inputs, and this opens up many new possibilities for you as a user.

It means that you are not only limited to viewing a single wireless backup camera’s signals, but you can also connect a second or third camera, as well as a DVD player, or even connect a video-game console, the choice is yours.

The monitor features four buttons labeled 1 through 4, and with a press on each button, you can easily switch to any of the four video channels.

– Wide Viewing Angle

The camera features a 120 degrees viewing angle, which is quite acceptable.

Having such a large viewing angle means that it can capture more areas of a scene in a near-field scenario, that is, without having to step back in order to take in more of the scenery.

This wide viewing angle is of course, an addition to the safety feature of the backup camera system.
wireless rear view camera

– Flexible Camera Mount

Being a wireless system, the camera can practically be mounted without any limitations.

It comes with all the parts necessary for its installation, as well as the ability of a 180 degrees vertical adjustment.

Pros of The Wireless Backup Camera System.

– Ease of Install
Given its wireless nature, the camera is much easier to install than wired systems.

The monitor can also be easily installed anywhere near the driver, and it even comes with an adapter that uses the cigarette lighter as a power source.

– 70ft. Wireless Range
Being able to transmit the video signals for such a long range, is a big plus.

– Integrated Wireless Modules
Both the camera and the monitor feature integrated wireless modules for the transmission and receival of the video data.

This is a plus, as opposed to other systems where the wireless modules can be separate devices.

Cons of The Wireless Backup Camera System

– Signal Interferences
All wireless signals are prone to interference. Most digital systems transmit in the 2.4 Ghz frequency band, which is used by many devices, and which often leads to signal interferences.

Our system transmits a high powered analog video, which although may still suffer from occasional interferences, provides an overall better video quality than digital systems.

Box Contents

1. User’s Manual.
2. Wireless HD Camera.
3. 5 inch LCD Monitor with wireless receiver.
4. Mount for Dashboard or Windshield.
5. Cigarette Lighter Adapter.
6. All necessary cables are also included.

Conclusion

If you are searching for the best wireless backup camera system, then you’ve found it.

The perfect match of a rugged and weatherproof camera, combined with a top-notch, 4 channel LCD video monitor.

The camera and the monitor are both technically compatible, and can easily be installed without problems.

Both also feature integrated wireless modules, making this backup camera system, a practical and functional system at its best.
more information