How To Install a Backup Camera
Backup Camera Installation Guide
We take our VS430 flush mount backup camera installation as an example to guide you how to install a rear view camera step by step.
If you drive an older vehicle, chances are it did not come with a factory-installed reverse camera.
Nevertheless, you can easily get one from a local auto shop and install it yourself.
Installation is relatively quick and easy provided you know a little about cars and power tools.
Basic knowledge on the workings of your car and the operation of a drill is all you need to install a rear view camera on the rear bumper of your vehicle.
Here’s a step-by-step backup camera installation guide to make things easier for you.
Step 1: Cut a hole in the bumper
The first thing you will need to do is cut an opening in your rear bumper in which you will install the camera.
The good news is that the backup camera kit comes with a hole saw to make your work easier and more precise.
All you need to do is to position the tool at the center of your bumper and drill the hole.
The hole saw often comes with the right measurements so don’t worry about getting the right diameter for the hole.
Step 2: Install the backup camera
This step might require you to either partially or fully detach the bumper from the vehicle depending on the type of car you drive.
This is because some may have a foam absorber on the inside which you can only gain access to by removing the bumper.
Thread the camera through starting with the cables (leads) but leave it dangling slightly outside so that you can adjust the view and the orientation before firmly installing it.
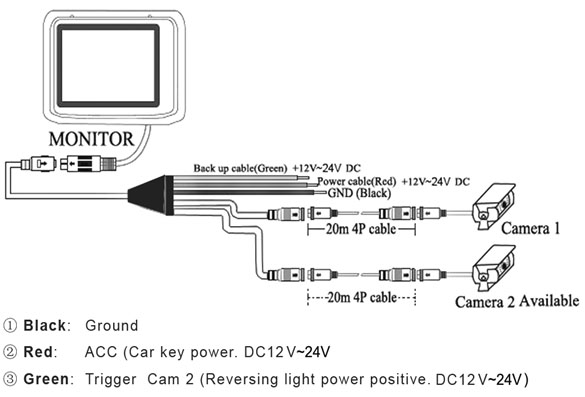
Step 3: Connect the camera and the monitor to a power source
rear cameras are usually powered by the reverse lights.
This makes them more convenient to use as the monitor and the camera will automatically turn on when you shift the gear into reverse.
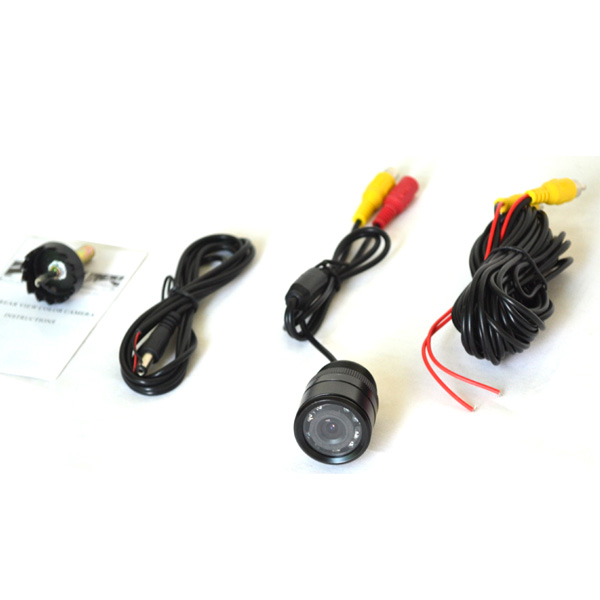
All the cables you will need will come provided in the backup camera kit.
Step 4: Connect the video cable to the monitor
Set up the camera feed by connecting the video cable from the camera to the monitor.
You can conceal the cable inside the interior upholstery of your vehicle or tack it onto the ceiling to keep it out of the way.
Routing it via the top part of your vehicle makes it easier to connect to the monitor, which attaches to the rear-view mirror.
Step 5: Install the monitor
Once everything is set up, you can now clamp on the monitor to the rear-view mirror.
Connecting the routed video cable to the monitor’s video interface is the final step.
When this is done, you can engage the reverse gear to adjust the orientation of the camera before pushing it firmly installing it into the hole.
The set-up is now complete and you can enjoy much safer reversing.
The camera and the monitor do not always have to be powered by the reverse lights although this proves to be the most convenient way.
Different vehicle models might require a slightly different installation procedure depending on the shape of the rear end of the vehicle.
This is an original post by Vardsafe